AWS ECS Fargate with Cloud Map service discovery for Microservices
I could find a lot of tutorials where ECS fargate was used to deploy a dockerized container with ease.
But I found it bit difficult to get an example deployment of a microservices application with all the internal communications with the application microservices layers.
And, of cource I bumped into many troubles to make it up; I thought I will just document it for an easy walkthrough for anyone else who would like to check it.
I could find an example from amazon blogs, but the example is very old one and the jdk not supported in most OSes now.
I did some more researches and googling, and simplified and modified some good examples, I could find whose links are given in the resources section in the end of this post.
So lets do it,
We have an imaginary ecommerce store selling books, which consists of three apis:
- Purchases Api: This application gives the purchases as a jason response
- Recommendations Api: Gives purchase recommendations for relevant books
- Dashboard Api: Create a consolidated dashboard data response, querying both the Purchase and Recommendations Api
The Apis are very simple .Net Core Apis and the code is availabel at git repo.
Prerequisites
You will need to have the latest version of the AWS CLI (version 2 or more) and docker installed before running the deployment script. If you need help installing either of these components, please follow the links below:
Creating the VPC, with related infrastructure.
We need a virtual network (VPC) to be configured into which we are deploying the ECS cluster and LoadBalancer with atleast two subnets and corresponding route table and gateway configured.
Since configuring all the settings at the AWS management console can be tedious and erroneous, I would prefer to deploy them using the CloudFormation Template:
The file is available at the repo and it looks like this:
AWSTemplateFormatVersion: "2010-09-09"
Parameters:
Mappings:
  SubnetConfig:
    VPC:
      CIDR: "10.0.0.0/16"
    PublicOne:
      CIDR: "10.0.0.0/24"
    PublicTwo:
      CIDR: "10.0.1.0/24"
Resources:
  VPC:
    Type: AWS::EC2::VPC
    Properties:
      EnableDnsSupport: true
      EnableDnsHostnames: true
      CidrBlock: !FindInMap ["SubnetConfig", "VPC", "CIDR"]
  PublicSubnetOne:
    Type: AWS::EC2::Subnet
    Properties:
      AvailabilityZone:
        Fn::Select:
          - 0
          - Fn::GetAZs: { Ref: "AWS::Region" }
      VpcId: !Ref "VPC"
      CidrBlock: !FindInMap ["SubnetConfig", "PublicOne", "CIDR"]
      MapPublicIpOnLaunch: true
  PublicSubnetTwo:
    Type: AWS::EC2::Subnet
    Properties:
      AvailabilityZone:
        Fn::Select:
          - 1
          - Fn::GetAZs: { Ref: "AWS::Region" }
      VpcId: !Ref "VPC"
      CidrBlock: !FindInMap ["SubnetConfig", "PublicTwo", "CIDR"]
      MapPublicIpOnLaunch: true
  InternetGateway:
    Type: AWS::EC2::InternetGateway
  GatewayAttachement:
    Type: AWS::EC2::VPCGatewayAttachment
    Properties:
      VpcId: !Ref "VPC"
      InternetGatewayId: !Ref "InternetGateway"
  PublicRouteTable:
    Type: AWS::EC2::RouteTable
    Properties:
      VpcId: !Ref "VPC"
  PublicRoute:
    Type: AWS::EC2::Route
    DependsOn: GatewayAttachement
    Properties:
      RouteTableId: !Ref "PublicRouteTable"
      DestinationCidrBlock: "0.0.0.0/0"
      GatewayId: !Ref "InternetGateway"
  PublicSubnetOneRouteTableAssociation:
    Type: AWS::EC2::SubnetRouteTableAssociation
    Properties:
      SubnetId: !Ref PublicSubnetOne
      RouteTableId: !Ref PublicRouteTable
  PublicSubnetTwoRouteTableAssociation:
    Type: AWS::EC2::SubnetRouteTableAssociation
    Properties:
      SubnetId: !Ref PublicSubnetTwo
      RouteTableId: !Ref PublicRouteTable
Goto the Management Console Stack creation page and upload the file for the deployment of file.
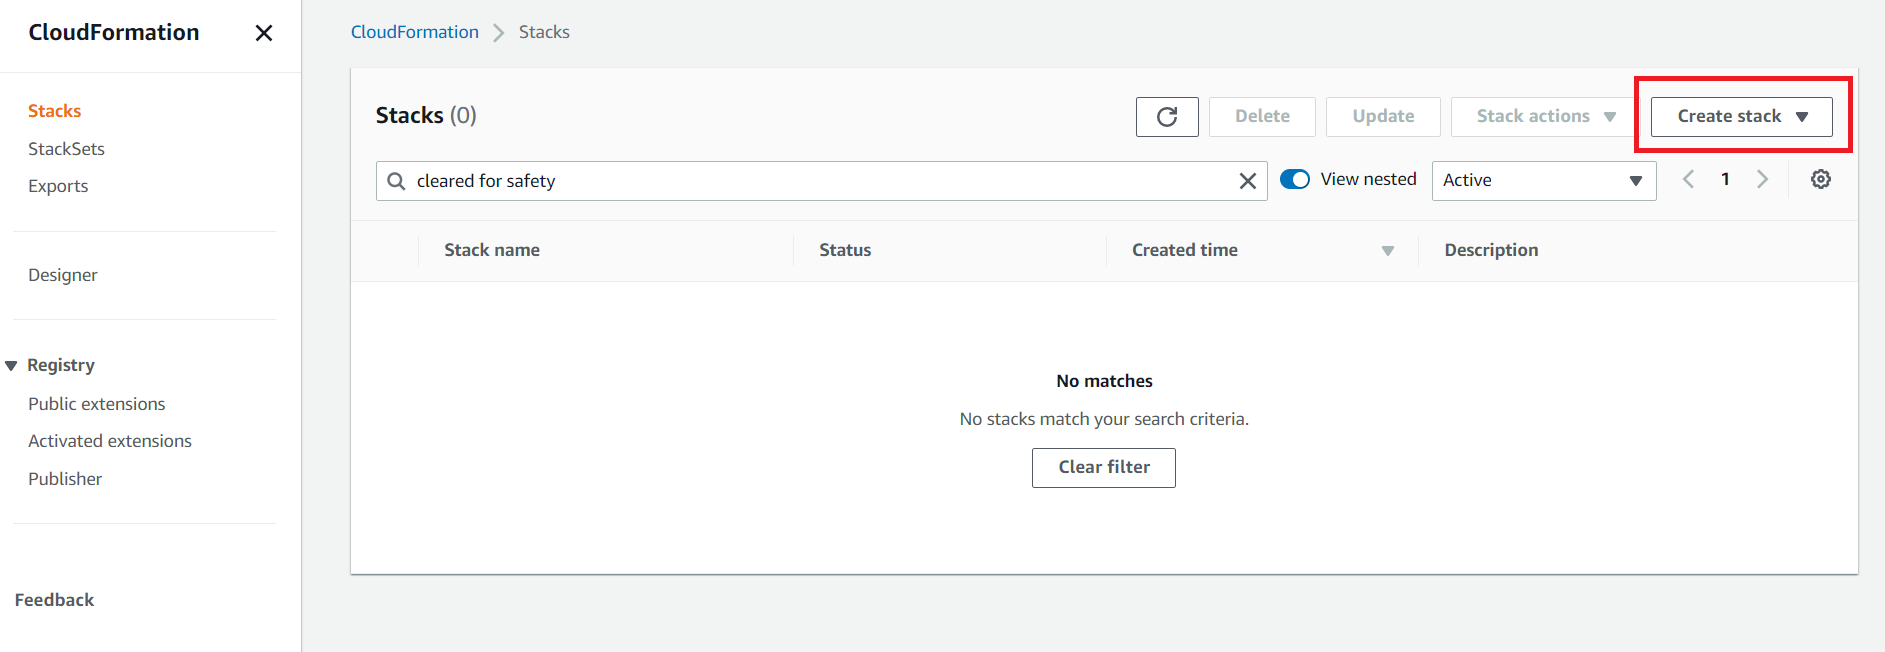
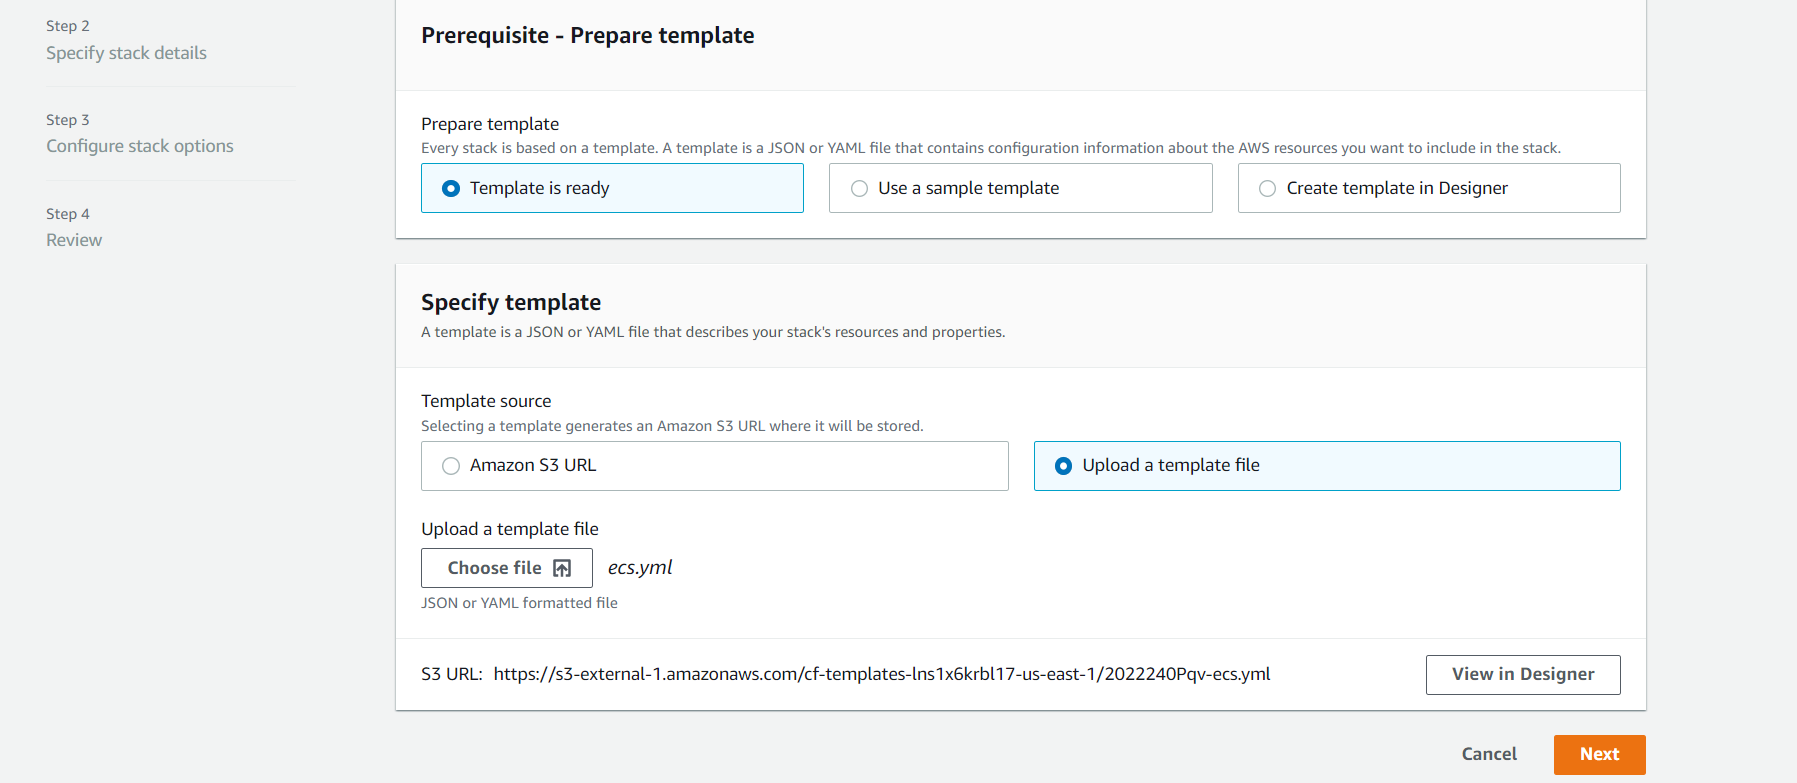
Give parameter names, click Next and complete the stack deployment.
Once done, the VPC along with the configurations will de created.
Create cluster
Once the deployment is done create the ECS cluster with the VPC created in the previous step.
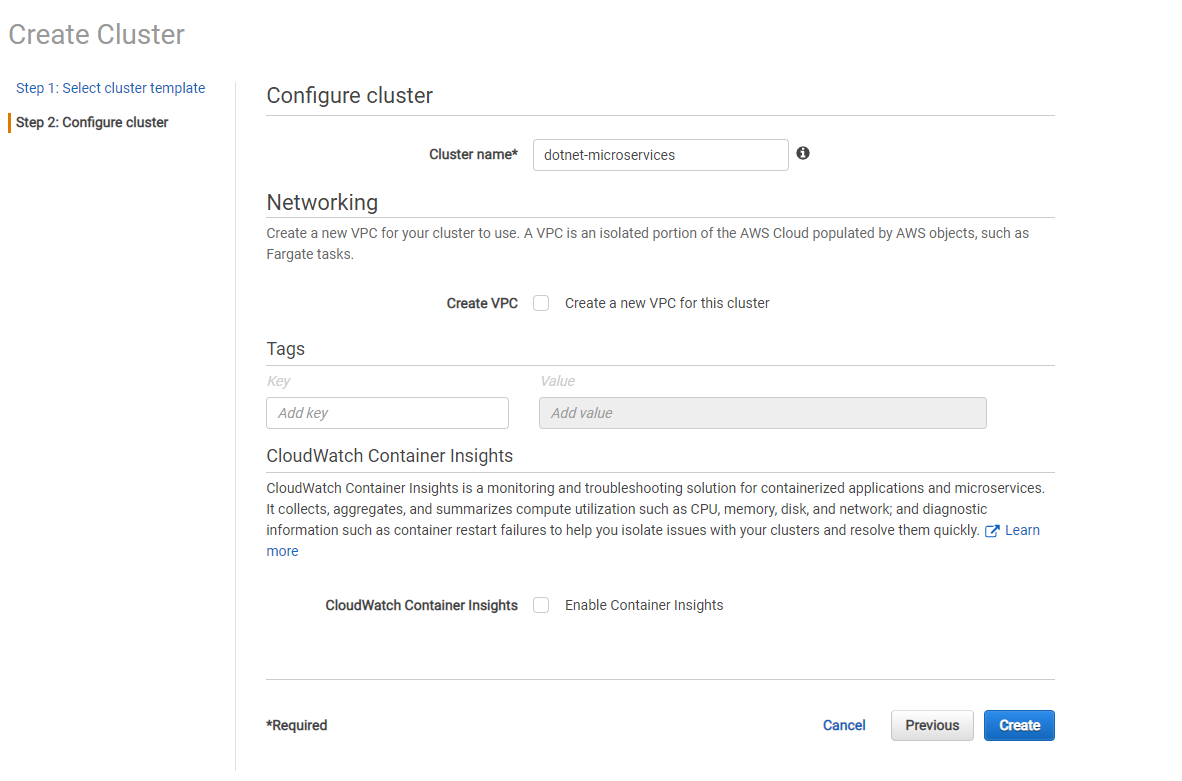
Create api images and push to repositories
You can clone the Api repo and use the docker file to create the images.
Run docker commands from the root directory.
docker build -t dashboardapi:latest . -f .\DashboardApi\Dockerfile
Create Repositories for all the 3 Apis with an appropriate name.

Notedown the account url for the repositories.
Log in to the repositories using the aws cli.
First use the account key, access_secret and session_token obtained from the management console.
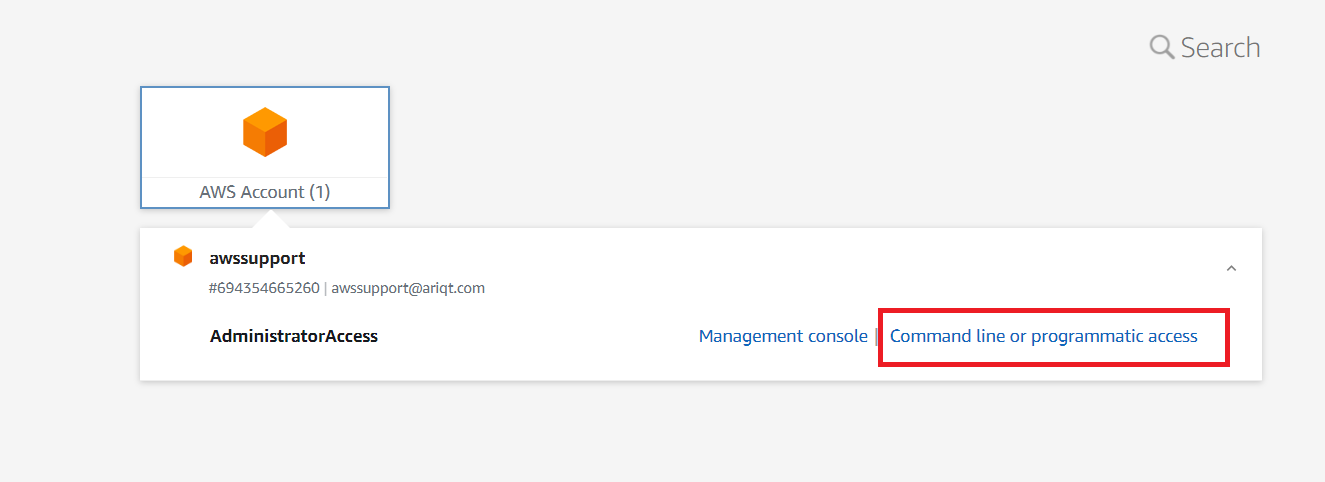
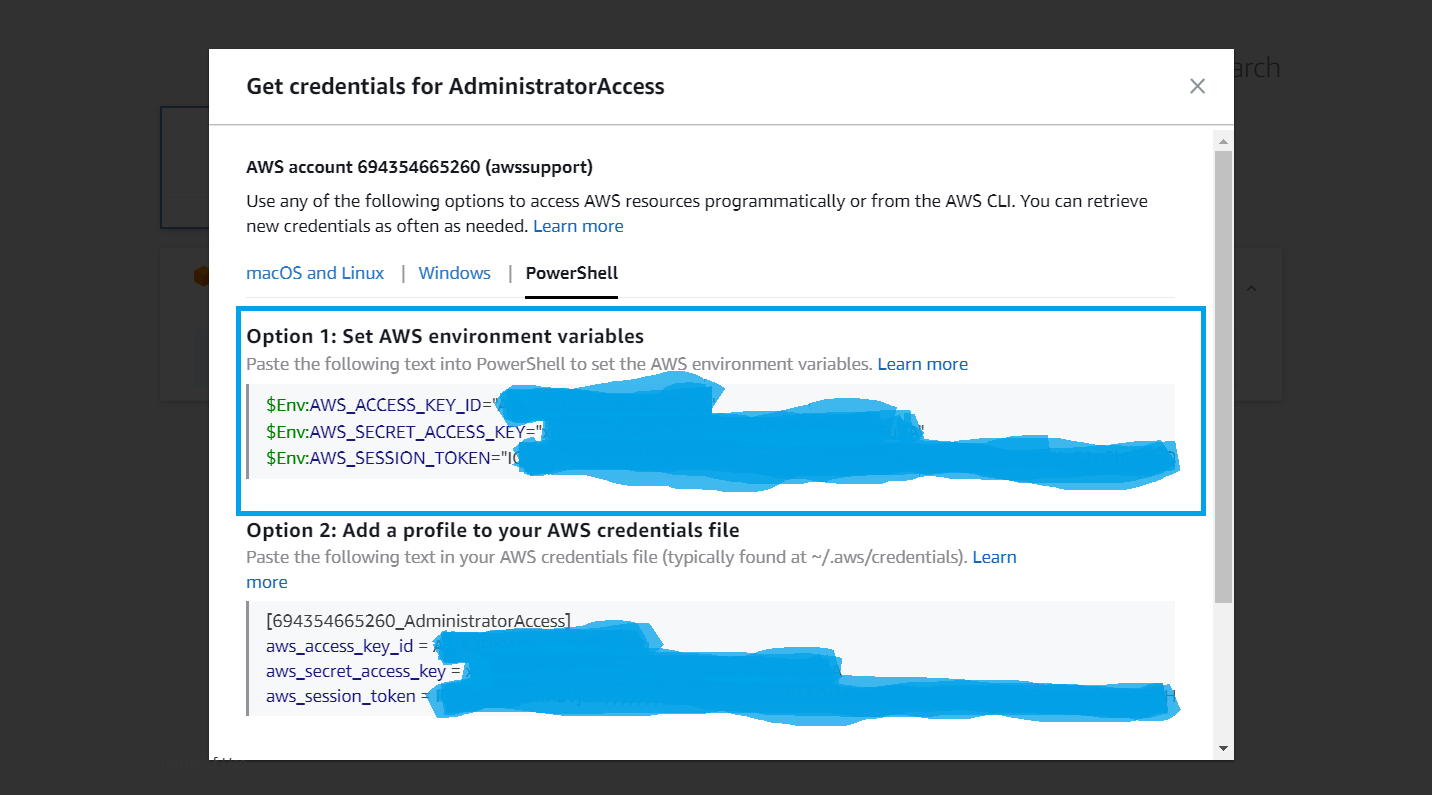
Copy paste the secrets into the terminal.
Use the aws cli to login to the corresponding repository.
aws ecr get-login-password --region us-east-1 | docker login --username AWS --password-stdin [ECR Account Url]/[Imagename]
docker tag [Local Image Name] [ECR Account Url]/[Imagename]
docker push [ECR Account Url]/[Imagename]
Note: Push all the 3 images to dedicated repos for each.
Create Load Balancer in the same VPC
Create the Laod balancer using the management console.
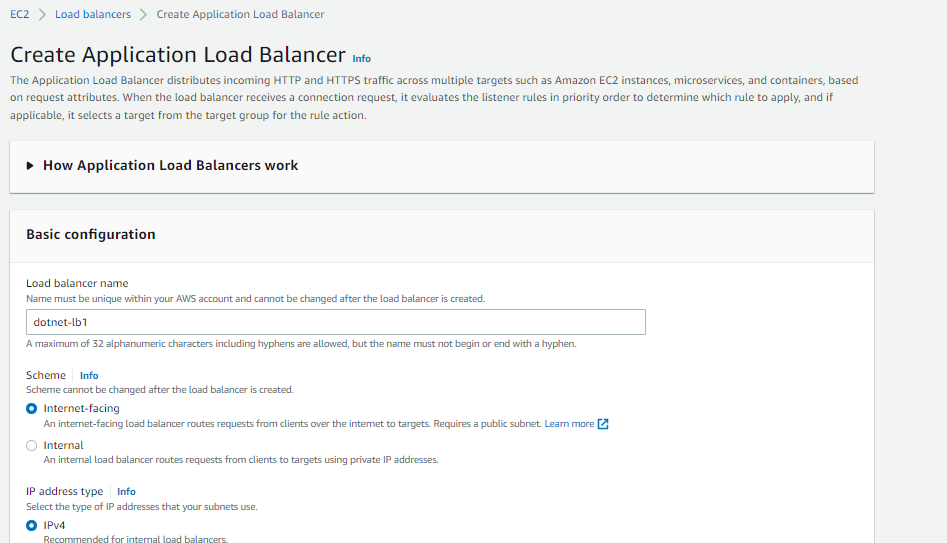
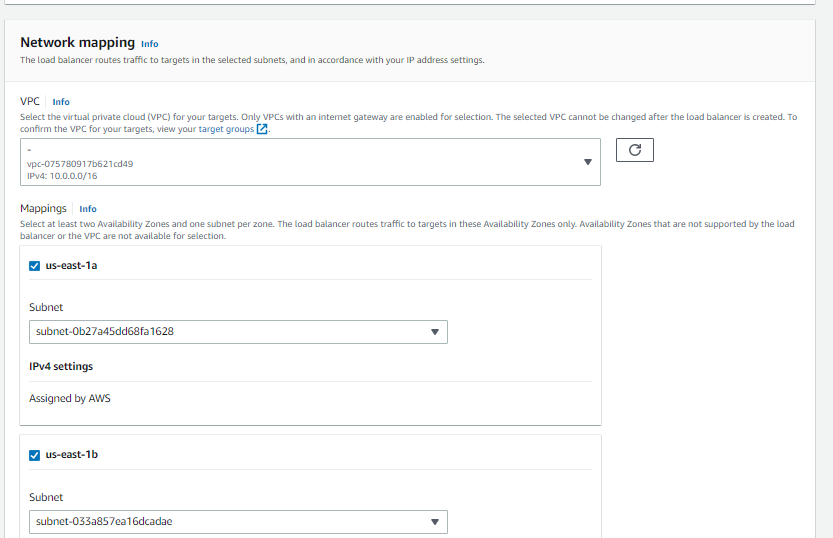
Create a default target group and attach it with the Load Balancer
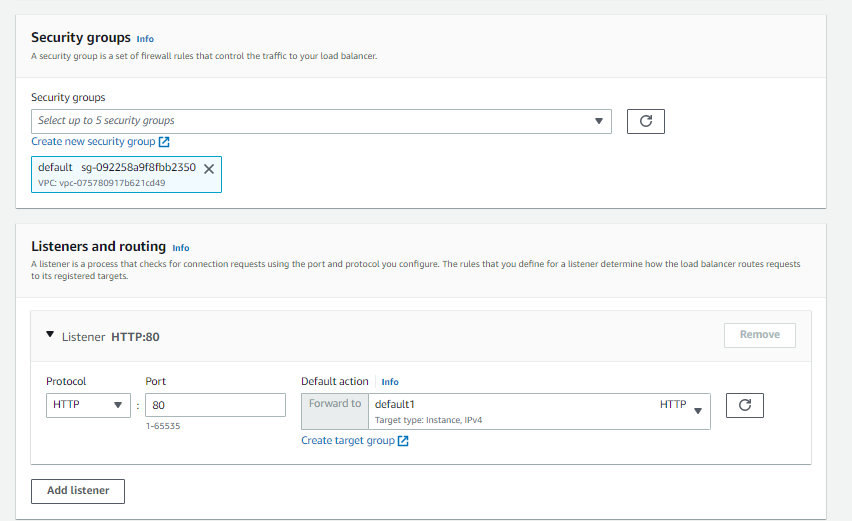
Define 3 Task Definition for all the 3 images.
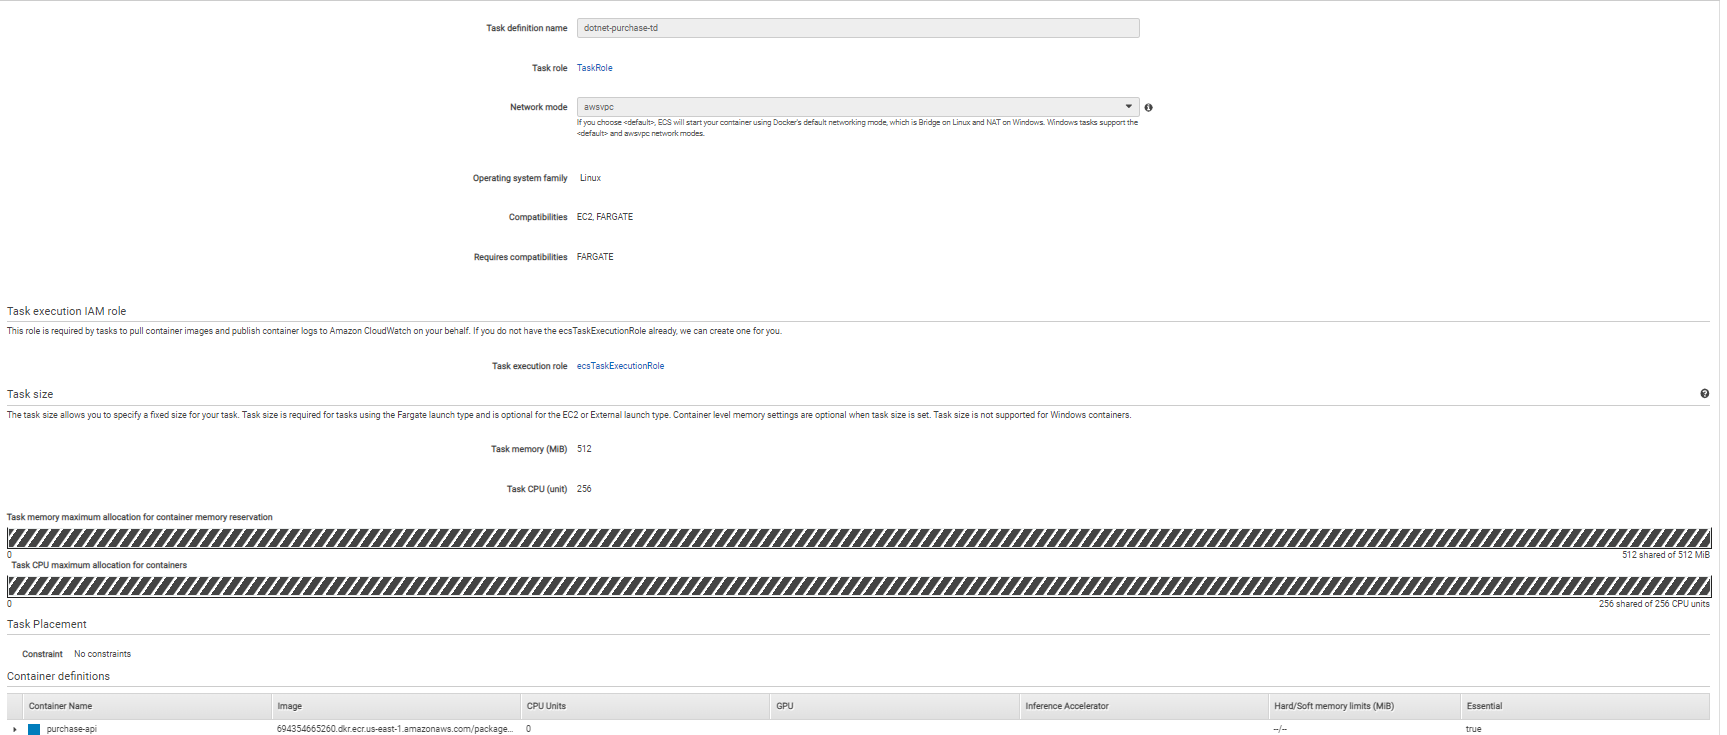
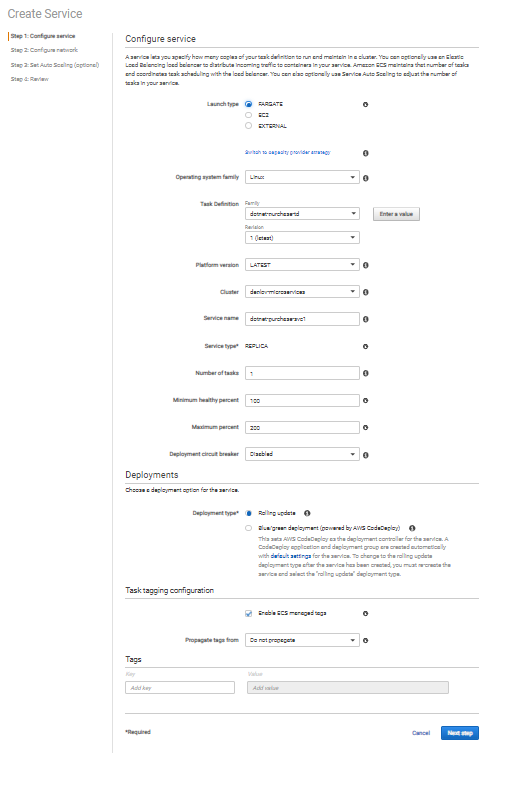
Create 3 services using the 3 Task definitions created
Create the service using the task definition
Finally the 3 services should be up and running something like this
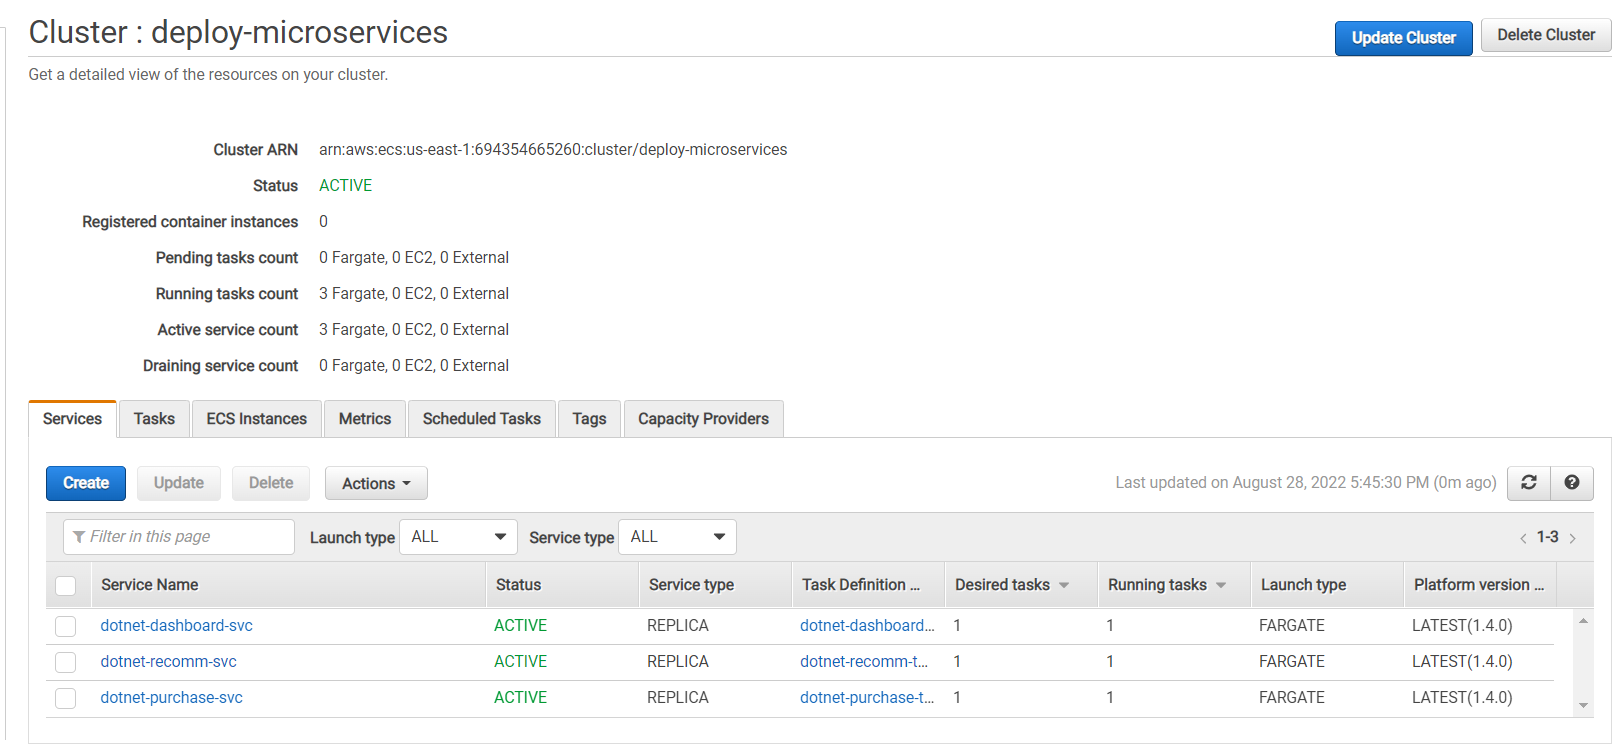
Check the services
Go to the Load balncer and find its DNS Name
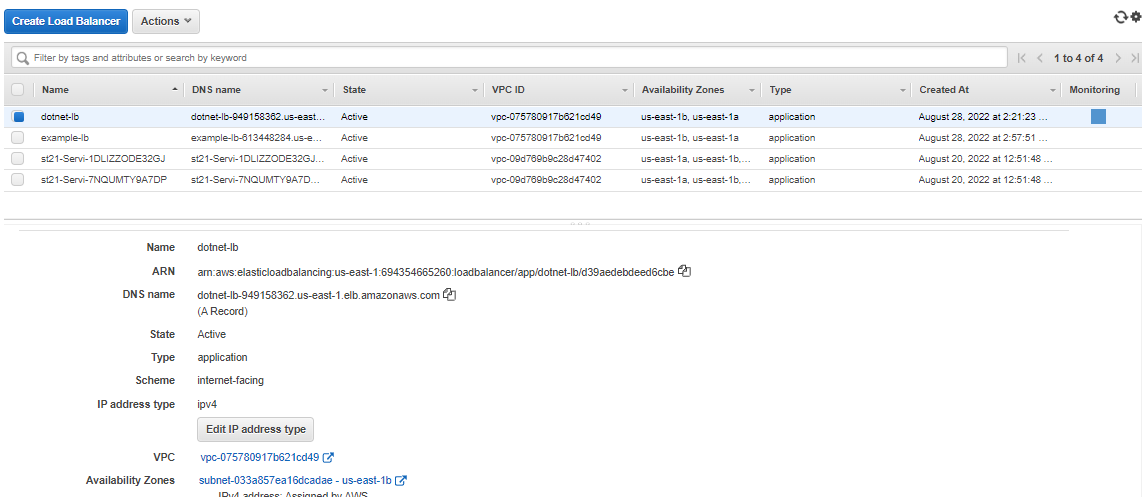
Go to the dashboard routing path and you should get the consolidated dashboard data as follows:
{
  "purchases": [
    {
      "bookName": "The Star Wars",
      "dateOfPurchase": "2022-01-01T00:00:00",
      "price": 100.99
    },
    {
      "bookName": "The Gladiator",
      "dateOfPurchase": "2022-01-01T00:00:00",
      "price": 49.99
    }
  ],
  "recommendations": [
    {
      "bookName": "The Eternals",
      "dateOfPublication": "2021-12-12T00:00:00",
      "price": 100.99
    },
    {
      "bookName": "The Seize",
      "dateOfPublication": "2010-12-12T00:00:00",
      "price": 39.99
    }
  ]
}